To connect Salesforce to Mitto, following the steps below.
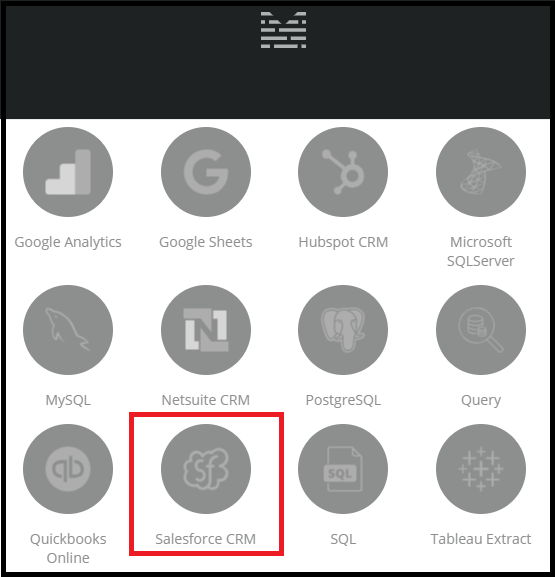
1. On the bottom left of your Mitto screen, click on Add Job.
2. Click on the Salesforce connector.
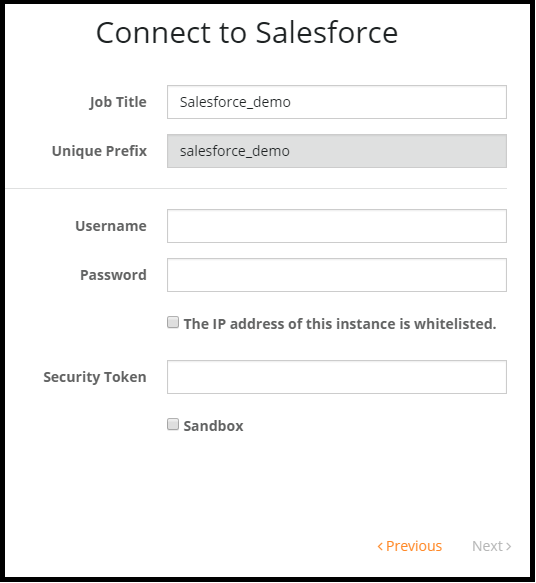
3. On the next page, you will see an authentication popup. Enter in your Username and Password to your Salesforce account.
Salesforce uses username/password authentication plus one additional mechanism, either:
- a security token
- a whitelisted IP address
The security token is the easiest to use, especially if there are no other integrations with the specified account.
- To obtain your security token, open another browser and go to your Salesforce page.
- Click on your Salesforce profile icon on the upper right hand corner of the page.
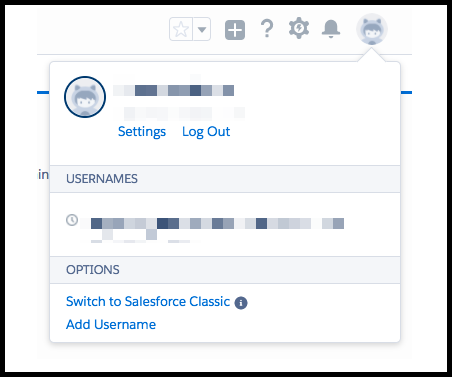
- Next, click on Settings.
- Select Reset My Security Token in the left hand navigation.
- Click the Reset Security Token button.
- The resulting token will be emailed to the user
The other option is to whitelist an IP.
- Click the gear icon in the upper right hand corner of Salesforce.
- Select Setup.
- In the Quick Find text box of the left hand navigation type: ‘Network Access’
- Click New
- Enter the IP address or range to whitelist
4. Whether you decided to take the security token route or the whitelist IP address route, make sure to enter in the information correctly in the Mitto popup. If you decided to take the whitelist IP route, make sure to click on the The IP address of this instance is whitelisted checkbox in order to input your organization ID.
5. After finishing up with this page, select Next.
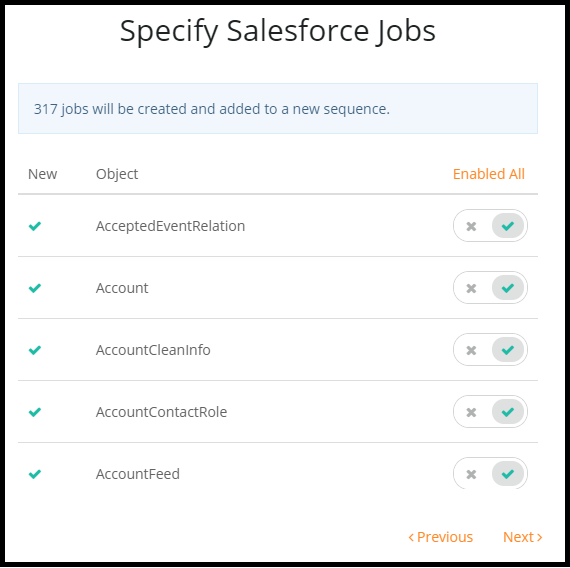
6. The next page asks you to select which Salesforce Jobs to add to a sequence. You can choose to enable all the jobs or you can disable all to pick and choose which jobs you want to be added.
Select Next after you have chosen which jobs you want to add.
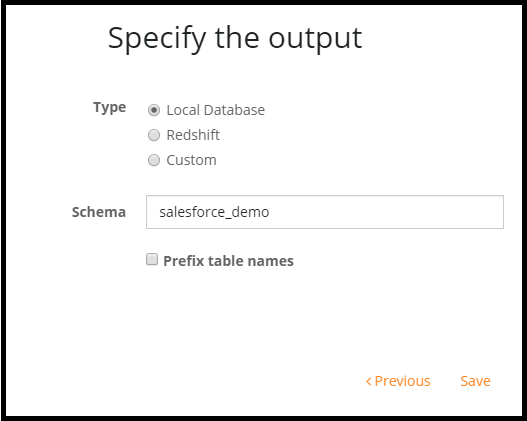
7. On the next screen, specify the output of your data.
- Local Database: Internal Mitto PostgreSQL database
- Custom: Specify the connection string of the destination database
Local database is recommended but you can choose an output of your choice.
After this, click Save.
Congratulations! You have just added Salesforce to Mitto. Next, you will want to schedule your Salesforce job(s). Learn how to schedule your job here.